You can turn underused basement square footage into comfortable, valuable living areas by planning layout, selecting multipurpose designs, and upgrading utilities to match your goals. A smart basement transformation focuses on efficient basement design, purposeful zones (guest suite, home office, gym, media room), and practical upgrades like lighting, moisture control, insulation, and storage to maximize usable space and long-term home value.
Start by picturing how each zone will function and flow. Open layouts expand sightlines, while defined areas keep activities organized. Practical storage, durable finishes, and right-sized mechanical upgrades make the space livable and low‑maintenance so you actually use it. Understanding basement costs early helps you set a realistic basement budget for your finished basement.
You’ll find ideas for flexible room layouts, compact storage solutions, recreation and wellness setups, and the utility improvements that keep the space comfortable and code‑compliant throughout the article.
Strategic Basement Layout Planning
Focus on measurable constraints and practical design moves that increase usable square footage, improve flow, and bring light into deep, below-grade spaces. Planning your basement renovation project carefully reduces basement remodeling cost overruns.
Assessing Square Footage and Zoning
Measure clear, finished floor area first: include rooms with a ceiling height of at least 7 feet and subtract structural obstructions like support columns and bulkheads. Create a simple floor plan to scale on graph paper or using a digital tool so you can see how much space each function (sleeping, living, storage) truly requires.
Check local building codes for egress windows, minimum ceiling heights, and mechanical-clearance requirements before you allocate bedrooms or rental units. Secure building permits and basement renovation permits early to avoid delays. Allocate dedicated mechanical and storage zones near existing HVAC, water heater, and sump locations to avoid costly relocations.
Prioritize functions that benefit most from access and privacy. Place guest suites or home offices near existing stairs or separate entrances, and keep noisy uses (home theater, gym) away from sleeping areas using closets or short hallway buffers. An egress window is essential for any basement bedroom to meet safety codes.
Incorporating Open-Concept Designs
Use an open concept basement plan to make narrow basements feel larger; remove non-load-bearing partitions to create continuous sightlines from the stairs through living and dining zones. Keep structural supports visible on the plan and design around them—turn a column into a media mounting point or a skinny storage unit. Proper basement framing ensures structural integrity while maximizing openness.
Define functional areas without full-height walls: use rugs, half-walls, built-in shelving, or ceiling treatments to delineate the kitchen, living, and workspace. Place a basement kitchen or wet bar near existing plumbing stacks to reduce costs and allow the open space to serve multiple purposes.
Maintain circulation paths at least 3 feet wide and align them with the stair orientation to avoid awkward dead zones. Plan for flexible furniture (sleeper sofas, folding tables) so the open area adapts to guests, work, or play.
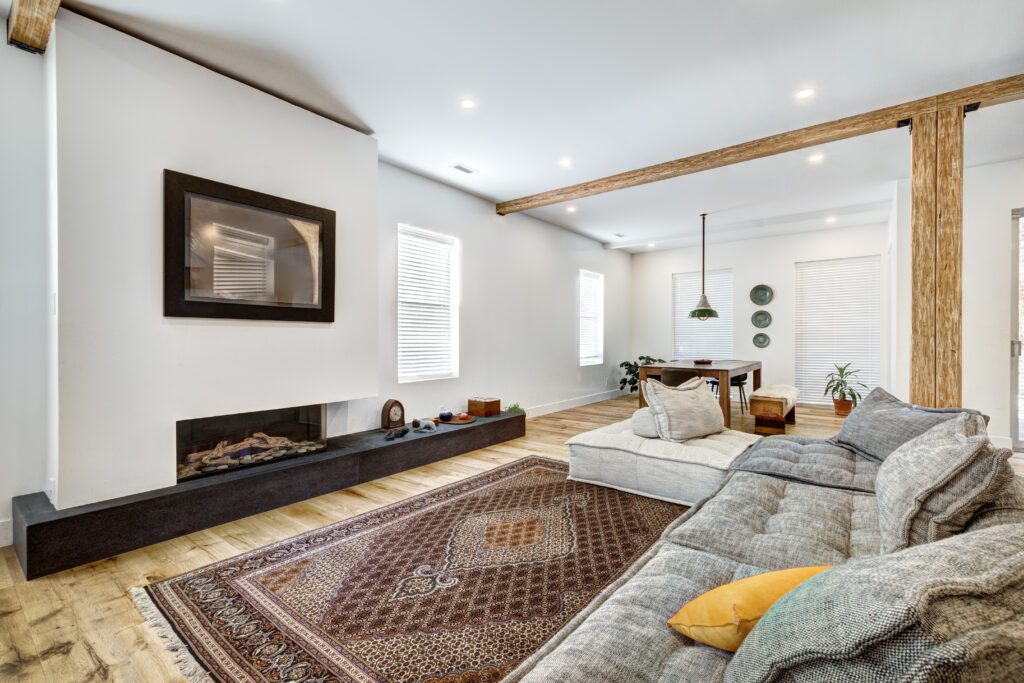
Optimizing Natural and Artificial Lighting
Maximize daylight by enlarging or adding basement windows where code permits; even shallow window wells with reflective surfaces increase visible sky and daylight penetration. Position major living zones and work areas closest to those windows to capitalize on natural light.
Specify layered basement lighting: combine recessed lighting for overall illumination, adjustable track or pendant lights for task areas, and wall washers or LED strips to lift low ceilings visually. Use dimmers to control mood and reduce glare in media or sleeping zones.
Choose high-CRI, warm-to-neutral color-temperature fixtures (2700K–3500K) to make finishes look natural and to reduce the cold, subterranean feel. Place fixtures to avoid deep shadows near basement stairs and lower shelves; add motion or occupancy sensors in hallways and storage rooms for safety and energy savings.
Multipurpose Room Ideas
Plan zones, choose durable finishes, and add flexible furniture and storage so the room adapts to different uses without major changes. Consider how each space contributes to return on investment and potential rental income if you plan an ADU conversion.
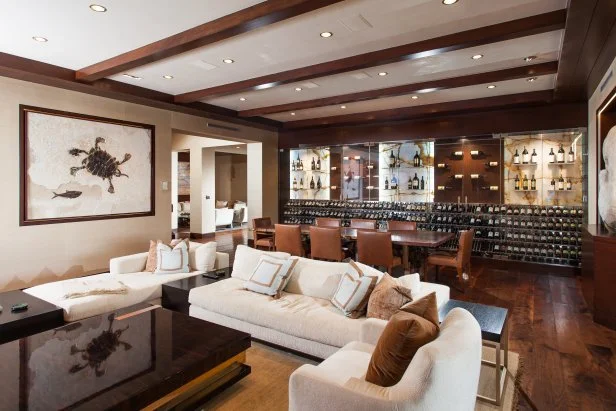
Creating Combined Living and Entertaining Areas
Define a media zone and a conversation zone using furniture placement rather than full walls. Place a sectional or sofa facing a wall-mounted TV at one end, and float two chairs with a low coffee table to form a separate social spot in your family room. Use a large area rug under each zone to visually anchor them.
Prioritize sightlines and lighting. Install recessed dimmable lights plus task fixtures over the entertainment area. Add acoustic panels behind the TV or on the ceiling to cut echo if you plan on movies or music. Include a basement bar with a small sink for convenient entertaining.
Choose finishes that tolerate traffic and spills. Waterproof laminate flooring, stain-resistant upholstery, and washable paints make upkeep easier. Use built-in shelving with adjustable shelves and concealed cabinets to store games, media, and barware.
Home Office Integration
Position the office near natural light or a window well; if none exists, install high-CRI LED lighting and a daylight-balanced lamp. Mount a full-size desk or a wall-mounted fold-down desk to save floor space while keeping a dedicated work surface.
Prioritize ergonomics and tech access. Use a comfortable adjustable chair, a monitor arm, and cable channels to keep cords tidy. Add a small filing cabinet that doubles as a printer stand and shelving for books and reference materials. Proper electrical wiring ensures adequate outlets for all equipment.
Keep the office visually separate but acoustically flexible. Use a glass partition or a bookcase as a divider to maintain openness while reducing sound. Include multiuse storage slotted bins for office supplies that can be repurposed when the space becomes a guest area or play zone.
Guest Suite Design
Create a private basement bedroom with a murphy bed or a daybed that converts for daytime use. Place blackout shades on any egress windows to control light and ensure privacy for overnight guests.
Provide essential amenities in compact form. Include a small wardrobe or clothes hooks, a luggage rack, and a bedside surface with outlets and USB charging ports. If plumbing installation layout allows, add a basement bathroom or wet room; otherwise, plan a clear route to the main bathroom with slip-resistant basement flooring.
Aim for layered lighting and climate control. Offer a bedside lamp, overhead dimmables, and a portable fan or zoned thermostat so guests adjust comfort independently. Keep linens stored in a closet or an ottoman with storage to streamline turnover between uses. Install smoke detectors and a carbon monoxide alarm for guest safety.
Functional Storage Solutions
Maximize usable square footage with storage that fits the shape and function of your basement. Choose systems that keep frequently used items accessible, hide clutter, and resist moisture.
Custom Built-In Shelving
Build shelving to the exact width and height of your walls to eliminate wasted space and create a clean, finished look. Use 3/4″ plywood or MDF with a moisture-resistant finish for long-lasting shelves; metal brackets work well for heavy bins and tools.
Designate zones when you lay out shelving: open shelves for toys and baskets, deeper cubbies for seasonal decor, and closed cabinets at knee height for cleaning supplies. Add adjustable shelves on at least one bay so you can store tall items like paint cans or vacuum cleaners. Integrate lighting LED strips under each shelf—so you can see labels without turning on the whole room.
Finish options matter: paint or laminate shelves to match your basement trim, and use clear, labeled plastic bins for items you access regularly. Anchor all units to studs and leave a small clearance from concrete walls to avoid trapped moisture.
Concealed Storage Spaces
Install concealed storage to keep the basement tidy while preserving usable floor area. Wall-mounted cabinets with push to open hardware hide clutter and maintain a seamless look.
Consider recessed cabinets in framed walls to avoid protrusion into walkways. For a multi-function media wall, place a shallow cabinet behind the TV for remotes, game controllers, and cords. Use moisture-proof materials—marine grade plywood or PVC panels inside concealed compartments if the basement has any humidity risk. For valuables or documents, a small built-in safe behind a false panel adds security without sacrificing design.
Label internal dividers and use foam inserts for fragile items. Concealed drawers with soft-close hardware reduce wear and keep stored items protected.
Under-Stair Organization
Convert the area under basement stairs into efficient storage instead of leaving it empty. Frame and finish the voided space, then choose between pull-out drawers, open cubbies, or a combination of both.
Measure carefully: depth and slope vary, so build custom drawers that utilize the full triangular volume. Install full-extension drawer slides for maximum access to deep storage. Use the lowest sections for bulky items like sports gear and taller corners for board games or a compact wine rack.
If you need flexibility, add removable bins on labeled tracks so you can swap contents seasonally. Finish the front with flush panels or cabinet doors that match your built-ins to maintain a cohesive basement aesthetic.
Recreation and Wellness Spaces
Design choices should prioritize layout, lighting, ventilation, and durable finishes that match the intended activity. Plan for electrical loads, storage, and clear circulation paths so each area functions safely and comfortably.
Home Gym Installation
Place heavy equipment on 3/4″ rubber flooring or interlocking mats to protect concrete and reduce noise transfer. Anchor a power rack to a reinforced area and leave at least 36–48 inches of clearance around machines for safe movement.
Install a dedicated circuit for treadmills or ellipticals to avoid tripping breakers. Mount mirrored panels on one wall for form checks and to make the space feel larger.
Consider a mini-split HVAC or a through-wall dehumidifier for humidity control to prevent mold; basements often need mechanical ventilation to keep air fresh. Add wall storage: heavy-duty hooks for resistance bands, a rack for dumbbells, and shelving for towels and cleaning supplies.
Media and Game Room Concepts
Position the main seating so the viewing angle to the center of the screen falls between 30–40 degrees for optimal sightlines. Use acoustical panels and a floating ceiling or carpet plus dense underlayment to minimize sound transmission to upper floors.
Choose LED bias lighting behind the screen to reduce eye strain and install dimmable recessed cans for ambient light control. For gaming, hardwired Ethernet drops improve latency; include at least one surge-protected outlet per major component and a small AV rack for consoles, receivers, and a power conditioner. Integrate smart home features like voice-controlled lighting and automated climate control.
Plan flexible furniture: modular seating for movie nights and a high-top table or shuffleboard for gatherings. Store media in closed cabinets to reduce dust and protect electronics.
Kids’ Play Area Ideas
Zone the play area with low shelving and labeled bins to keep toys visible and easy to tidy. Use foam tiles or wipeable vinyl plank flooring for a soft, washable surface that withstands spills and crafts.
Create a small reading nook with a low bookshelf and soft lighting, and mount safety gates or removable railings if you’ll occasionally separate younger and older kids. Anchor furniture and secure any wall-mounted items to studs to prevent tipping.
Install a dedicated craft wall with chalkboard or dry-erase panels and a washable wall-mounted table that folds up when not in use. Plan for outlet covers, rounded corners on built-ins, and washable paint for frequent, easy cleaning.
Upgrading Basement Utilities and Comfort
Address insulation, moisture control, HVAC, and soundproofing to make the basement livable year-round. Focus on targeted fixes—vapor barriers, efficient HVAC zoning, and decoupled walls—to reduce drafts, dampness, and noise. These upgrades impact basement finishing cost but improve long-term comfort.
Improved Insulation and Moisture Control
Install a continuous insulation strategy: rigid foam on concrete walls or spray foam in rim joists prevents thermal bridges and raises wall R-values. Seal cracks in the foundation and add a perimeter drain if you have recurring water seepage. Professional basement waterproofing protects your investment.
Add a certified vapor barrier on the warm side of insulation and use closed-cell spray foam where space is tight; it both insulates and blocks moisture. For floors, choose engineered subfloor systems or an insulated underlayment to keep surfaces warm and reduce condensation.
Control interior humidity with a dehumidifier sized for basement cubic feet (look for units listing basement capacity) and route its condensate to a drain or sump. Install a hygrometer and water detection system, aiming for 40–50% RH to protect finishes and reduce mold risk.
Heating and Cooling Upgrades
Evaluate existing hvac system capacity before adding conditioned space. Extend existing ductwork only if static pressure remains within manufacturer limits; otherwise add a dedicated mini‑split or a zoned ducted system for the basement.
Mini-split heat pumps provide efficient heating and cooling without major ductwork. Choose units with inverter compressors and heat pump capability down to at least 5°F (−15°C) if you need winter heating performance.
Balance ventilation with an ERV or HRV if your basement will be a bedroom or long-term living area. These systems exchange stale air while recovering heat and limiting humidity transfer. Place supply registers high on walls and returns near the ceiling where possible to promote circulation.
Soundproofing for Privacy
Prioritize decoupling when you want real noise reduction: resilient channel or hat channel on ceiling joists isolates drywall from structure-borne noise. For walls, use staggered studs or two separate stud walls to break sound paths. Consider a drop ceiling with acoustic tiles for easier access to utilities.
Add mass and damping: two layers of 5/8″ drywall installation with a viscoelastic compound like Green Glue between sheets reduces airborne noise. Fill cavities with dense insulation such as mineral wool; it both insulates thermally and absorbs sound. Proper basement ceiling treatment significantly reduces noise transfer.
Seal airborne leaks with acoustic caulk at perimeter gaps, electrical boxes, and around ducts. Use solid-core doors with perimeter seals for rooms that require privacy. These measures combine to lower both transmitted voices and impact noise from above.
Whether you’re planning a legal basement apartment, a rental suite, or a custom family space, basement contractors at Lifetime Building Services are here to help. Our professional contractor team handles everything from permits to final finishes with quality craftsmanship and full code compliance. We provide transparent basement remodel price estimates so you understand all basement costs upfront.
📞 Call 905-564-0162 or email info@lifetimebuildinsgs.ca today for a free consultation and turn your basement into valuable living space.